Important metal raw materials – zinc alloy inspection standards
Purpose:
In order to clarify the inspection specifications and requirements of CQI Inspection Company for Zinc alloy , this product inspection requirement is specially written to standardize the company’s quality inspection service level for customers.
Scope of application
This inspection technical document is used to standardize the pre-shipment inspection service of Zinc alloy .
Defect definitionfor Zinc alloy inspection:
Serious defects (CRT): the user’s life is a major hazard or has the potential to harm and violate the relevant safety requirements of defects
Major defects (MAJ): affect the use of the product, reduce product reliability and service life or seriously affect the product image defects
Minor defects ((MIN): the product has a slight appearance defects and does not affect the product function defects
The level of inspection:
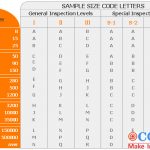
Sampling standards: MIL-STD-105E
Acceptance level (AQL): CR=O MA=1.5 MI=4.0
Common appearance and functional defects for Zinc alloy inspection
1) Dirt, scratches, deformation, burrs, oxidation, defects, rust spots, benefit glue,plating off, foreign colors.
2) Uniformity of the plating layer: the requirement of high light, uniform color, no color, no color difference
3) No rust spots, blistering, peeling, bright spots, black shadows, oil stains, pits, black spots, pockmarks, scorching, warping, deformation, slight water and salt stains, roughness.
Common Testing Items for Zinc alloy Inspection
1)Plating thickness
The thickness of each plating layer is tested to meet the requirements of customers and engineering drawings.
2)Adhesion test
Use a sharp blade (blade angle 15°~30°) to cut 10×10 small grids of 1MM×1MM on the surface of the test specimen, each line should be cleaned with a brush; use a brush to clean the debris in the test area.
Use the adhesive force 350~400G/CM2 tape (3M 600 tape or equivalent) to firmly adhere to the test grid, and wipe the tape with an eraser to increase the area and strength of the tape and the area to be tested; grab one end of the tape with your hand, and quickly pull off the tape in an oblique direction (45°), and perform the same test three times in the same position.
The result is judged: the adhesion force of 4B is qualified.
5B a scribe line up to the edge of the smooth, in the edge of the scribe burst and intersection are no paint off;.
4B – in the intersection of the scribe line has a small piece of crabapple off, and the total area off less than 5%;.
3B-small pieces of paint fall off at the edge of the scribing and intersection, and the total area is between 5% and 15%;
2B-There are pieces of paint peeling off at the edges and intersections of the scribed line, and the total area of peeling off is between 15% and 35%;
1B – There are pieces of paint peeling off at the edges and intersections of the scribed line, and the total area of peeling off is between 35% and 65%;
OB – paint is peeling off in patches at the edges and intersections of the scribed lines, and the total area of peeling is greater than 65%.
Note: When the test area is small. It is not required that 10×10 small squares must be scribed, the number of scribing can be determined according to the small size of the test area, and no peeling of the coating is required.
3)Abrasion resistance test mold design and manufacturing
Using a special NORMAN RCA abrasion tester (model: 7-1BB-647) and a special paper tape (11/16 INCH WIDE × 6 or 8INCH DIAMETER), a load of 175G is applied and the paper tape is driven to rub on the sample surface for 300 cycles.
(Note: The test is required for products with UV sprayed surface)
Judgment of result: The test is passed when the plating does not penetrate the bottom after completion.
Using a special NORMAN RCA abrasion tester (Model No. 7-1BB-647) and a special paper tape (11/16 INCH WIDE×6 or INCH DIAMETER), a load of 175G was applied and a fine paper tape was driven to rub the sample surface for 50 cycles.
Note: The test is required for products that have not been sprayed with UV on the surface)
Judgment of results:i After the completion of the test, the plating will be qualified when it does not penetrate the bottom.
4)Abrasion resistance test
A pure cotton cloth dipped in anhydrous alcohol (concentration ≥99.5%), wrapped in a special 500G weight head (the area of the test head is about 1CM2 after wrapping the cotton cloth), and wiped back and forth on the sample surface for 200 cycles at a speed of 40~60 times/min and a stroke of about 20 MM.
The result is judged as follows: i After the test is completed, the plating is qualified when it does not penetrate the bottom.
5)Hardness test
Using a 2H pencil (Mitsubishi brand), sharpen the pencil core into a cylindrical shape and smooth it on 400-grit sandpaper, put it on a special pencil hardness tester (the load applied to the pencil tip is 500G, and the angle between the pencil and the horizontal plane is 45°).
Push the pencil forward to slide the male about 5MM long, a total of 5 scratches, and then wipe the pencil marks with an eraser.
Result judgment: check the surface of the product for scratches, when there are 2 or less is qualified.
6)Hand sweat resistance test
The sweat-soaked non-woven fabric is put on the surface of the product and sealed with a plastic bag, and then the sweat on the surface of the product is wiped clean after 48H at room temperature, and the appearance of the plating is checked, as well as the adhesion and wear resistance of the plating.
The result is judged that the plating on the surface of the product is not abnormal, and the adhesion and abrasion resistance test is qualified.
Note: The composition of sweat is ammonia 1.07%, sodium chloride 0.48%, and the rest is water.
7)Temperature shock test
Temperature cycle sequence is as follows:
A) placed in a low temperature chamber at a temperature of -20℃±2℃ for 1H;
B) in the temperature of 20 ℃ ± 5 ℃ in the room temperature box placed 0.5H;
C) placed in a high-temperature chamber at a temperature of 70°C ± 2°C for 1H;
D) 0.5H in a room temperature chamber at 20℃±5℃;
Requirement: the switching time between the temperatures is less than 1MIN, a total of 12 cycles “48H). q After the test is completed, check the surface of the product plating layer without blistering, peeling, plating off and other undesirable phenomena, and test the adhesion and wear resistance of the plating layer qualified.
8)Salt spray test
Test equipment: salt spray test chamber
Inspection period, number of samples: 5pcs are taken from each batch of incoming materials
Test methods and conditions: according to the national standard GB/T10125-1997, the salt spray test chamber debugging temperature of 35 ℃, the configuration of salt solution PH value in the range of 6.5 ~ 7.2, the solution concentration of 5 ± 1%, the salt spray deposition of 1 ~ 2mL / 80cm2.h of soluble night;
Put the experimental product into the smoke test chamber. The test sample is subjected to continuous spraying test for a minimum of 48H
Test judgment: after the test is completed, flush with water first, then wipe with a dry cloth and observe, the surface of the coating should not be off, rust, corrosion and other adverse phenomena, it is judged OK, otherwise NG.
9)Solderability test
According to the standard QT 2028-90 hardware plating parts need to be welded (such as the baseband screen Wei cover) for the weldability j test
Test method: the pins will be found in the no-clean flux 3 ~ 5 seconds to take out and shake dry, and then immersed in the temperature of (235 ± 5) ℃ solder pot 3 ~ 6 seconds “solder should be B3 tin that is 83% of the solder composition of tin and 37% of lead).
After taking out the natural cooling, observe the solder firmly, its surface solder should be evenly distributed and the surface is bright silver white.
Summary
The above is the specific content of the Zinc alloy inspection standard, but with the continuous development of the product manufacturing industry and the adoption of new materials and new production processes, new types of quality problems and new product testing requirements will directly result. Therefore, it is necessary to update the Zinc alloy inspection standard irregularly.
CQI5 is committed to providing importers worldwide with product quality inspection services that far exceed those of our peers. If you are planning to import or have imported from China or Southeast Asian countries, please contact us cs’@’cqipro.com to learn more about how we can make your imports safer.
This article is an original article for CQI Inspection, who is committed to providing high-quality product inspection technology and know-how sharing for global importers and retailers to make imports safer.
All rights reserved. The contents of this website provided by CQI Inspection may not be reproduced or used without express permission.


